|
I will do my best to be very clear as to how to work with the metals. It helps if you know how to braid. Unlike braiding hair, when you cross the wire, you don't "fold" the wire, you will ease/bend it around. You will see how this work as we actually make the bracelet. Five Lead Braided Copper Bracelet Here are the things you will need. Don't let the big spool of wire scare you. You can purchase wire in very small packets at places like Lowe's, Home Depot, etc. Or you can have some cut off to the length you like. 
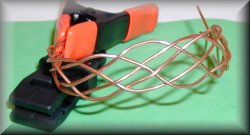
First, cut 5 strips of wire 8 inches long. Hold the wires together so they are flat then put one end (about 1/2") in a clamp to hold them 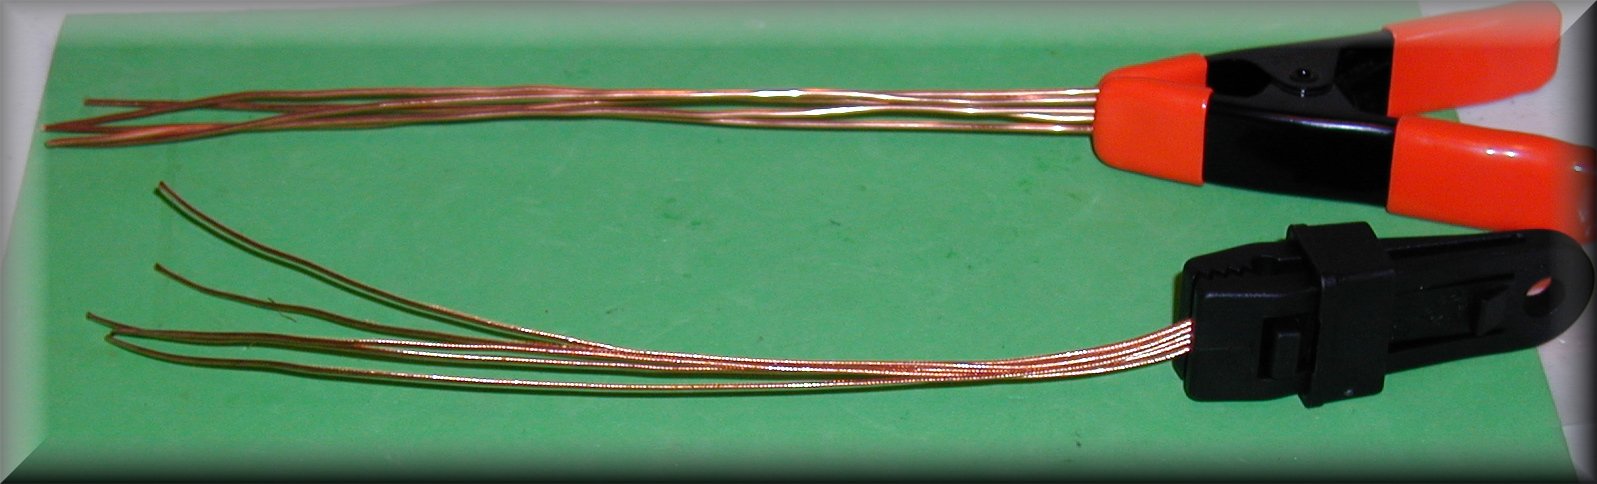
Just as with any braid, you need to determine whether you will start from the right or left side. It doesn't really make any difference. Whatever is easiest for you. 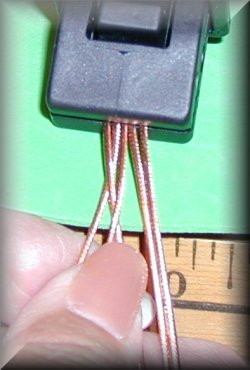
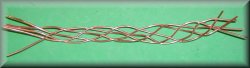
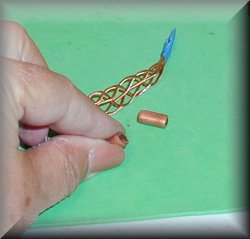
When you use 5 leads, it is simply a matter of "Over and Under." Notice how I took the outside lead brought it over the second lead and under the third lead.(1,2,3)
Then you take the outside lead on the other side (5,4) and bring in over the lead next to it (4) and under the middle lead again. Confusing? Just remember OVER AND UNDER, OVER AND UNDER. 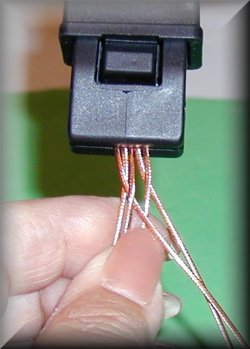
Braid sort of loosly. You will want to have loops - but be consistant. In these pictures, I have used the twisted wire for a soft bracelet.
Just below, following the exact same steps, are pictures of solid copper wire. 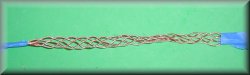

Remember: OVER AND UNDER, OVER AND UNDER. We are going to round out these wires so don't try to pull them too tight. This will come with practice. Since copper is inexpensive, you may want to do a couple to get the feel of working with wire. 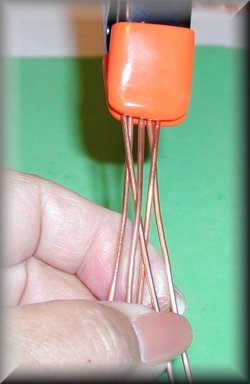
OK, now we have 2 rough bracelets. Let's pick up the soft wire one and start to shape it. This is done very easily by gently bending the bracelet over your fingers and inserting a pencel or rounded object in the outside loops to shape them. You can use your thumb to apply gentle pressure in forming. You will be amazed at how easily copper conformes. Sometimes, it bends too much but it can be smoothed out again - no problem. 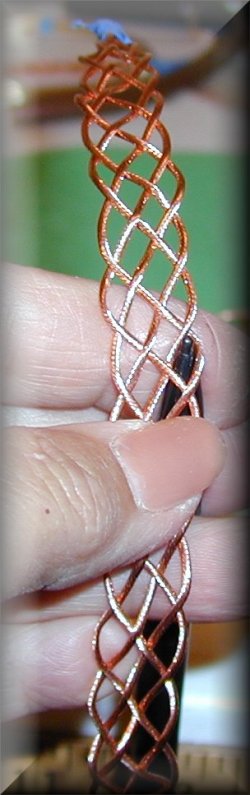
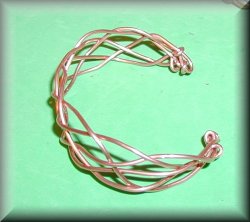
Keep in mind, as you are shaping your bracelets, that the human wrist is NOT ROUND! It is more of an oval or oblong shape. The soft wire bracelet is no problem because it is flexable and will conform to the wrist. The solid wire bracelet is more interesting. With copper, you can mostly form your wire by hand but if you would like, Many times, when I am making cuff style bracelets, I use an Ax Handle(without the Ax head) to form the shape. It is very similar to the human wrist. 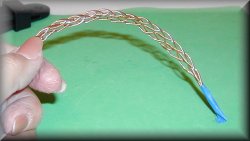
Finishing the ends of your solid wire bracelet can be a little tricky. You have a couple of options.
One: Use one of the outside wires to wrap around the others a couple of times, then turn the ends up (using round nose pliers).
Two: Just kind of wrap the ends around themselves and create a little knot on the end of the bracelet. 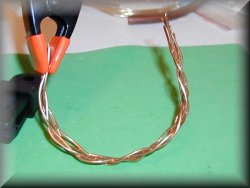
On the soft copper, I have found that using Copper Tubing is the best way (for me atleast) to finish the ends. I use 1/4" ID tubing for a 5 lead bracelet. I use 3/8" ID tubing for 7 lead bracelets.
Experiment with different lengths - I prefer 1/4 to 1/2 inch lengths of tubing. Give your tubing a gentle squeeze to make it more oblong - the wires go in easier this way. Once you fit your wires into the tubing to your satisfaction, then you can squeeze hard to tighten the tubing down. I go around the tubing about 3 times in all places to make sure it is tight.
You can use a Dremel tool with a rubber tip to smooth of the sharp edges of the tubing. Once they are smooth to the touch, you will need to drill a couple of holes in each end - insert a couple of jump rings and maybe a third one to hold the two together. Then you can either purchase a clasp at your local craft store, or make your own clasp. (tutorial coming shortly.) 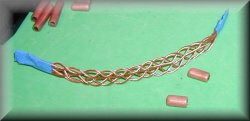
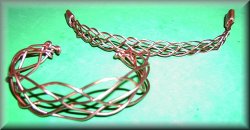
Here are both bracelets. The solid wire one is finished.
The soft wire bracelet was left open purposely to give you the choice of closures.
I hope you enjoyed this tutorial and would love your feed back. Please feel free to contact me.
Please come and take a look.
|